Table of Contents

For this gentle introduction to Thunkable, you’ll make a very simple scorekeeper app.
This app has just three things: two buttons, and a single piece of text. The number goes up when you click the “Increase” button, and goes down when you click the “Decrease” button. Let’s get started!
Adding Your Components
Step 1: Begin with a blank project.
Log into Thunkable and create a NEW project. Call it “ScoreKeeper App”!
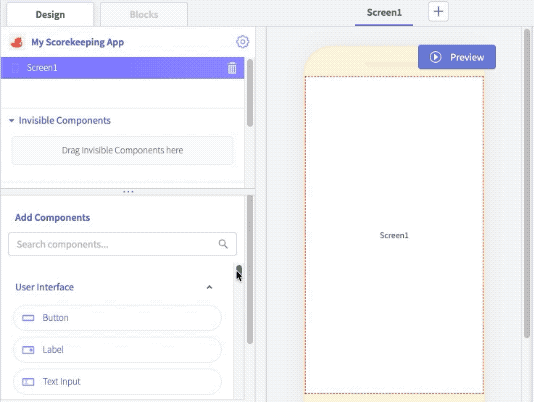
Step 2: Add a Label to your screen.
In the left menu under Add Components > User Interface, you’ll see a list of components you can add to your app, like “Button”, “Label”, and “Text Input.”We’re going to begin by dragging and dropping a label onto our screen. A label is just a piece of static text that will appear in our app. This label is going to display our score.
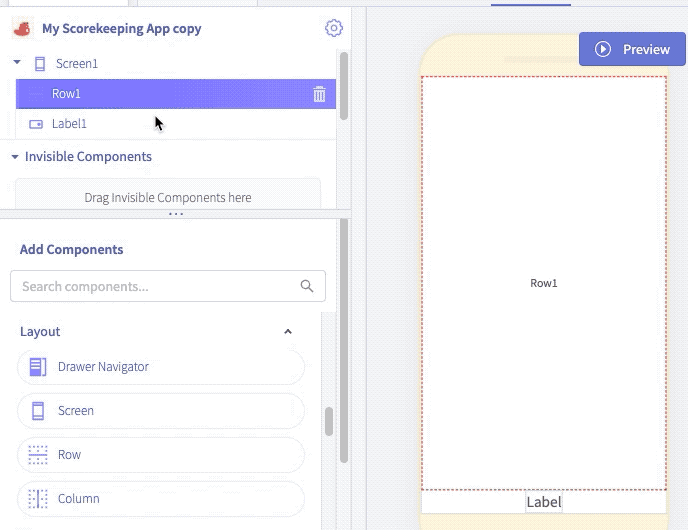
Step 3: Add a Row to your screen.
Next, we want to add a Row to our screen. This is something that will let us position our two buttons side by side (in a row!).You’ll find the Row component under Add Components > Layout (you may have to scroll down a little bit). Drag and drop the Row component onto your screen.
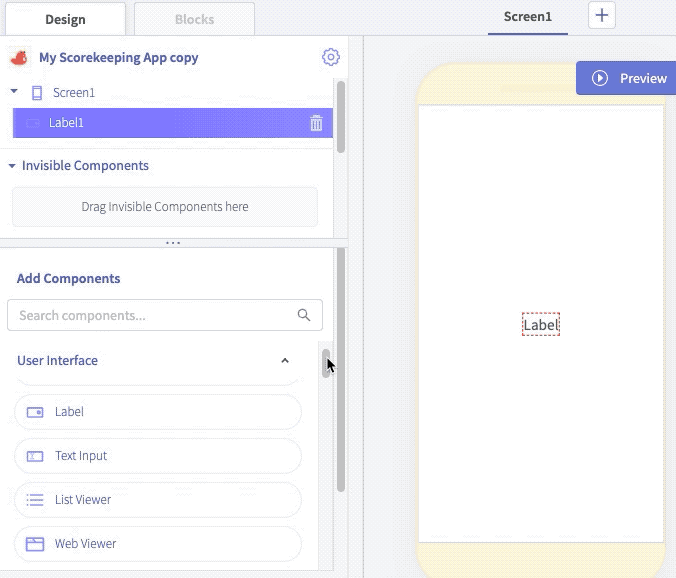
You want the row to appear under the label–if it shows up on top of the label, that’s okay! Just drag it in the component tree to appear under the Label.
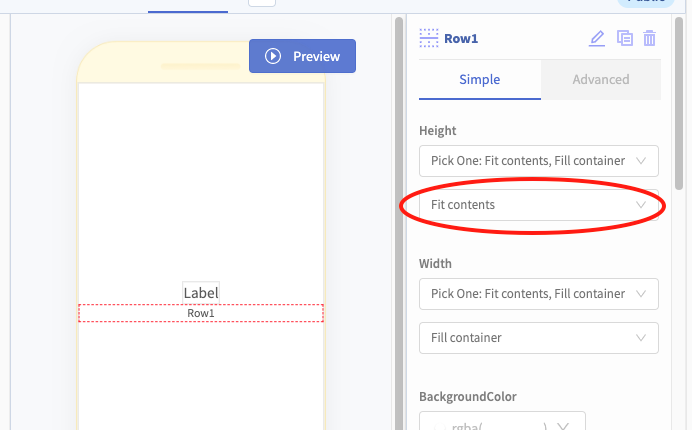
You might notice that the row looks a little funky: it’s REALLY tall! If your row looks like that, take a look at the settings in the right hand side. For Height, select “Fit contents” instead of “Fill container”. That should give you a normal looking row.
Step 4: Add your buttons.
Now we want to add our buttons! I’ll start by dragging and dropping my buttons onto the screen. That should give me a screen that looks a little bit like this:
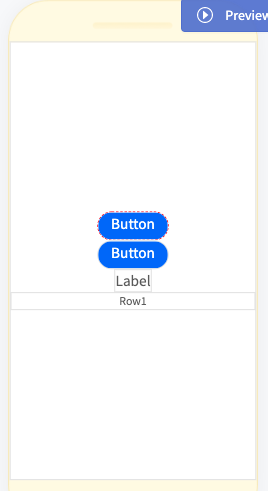
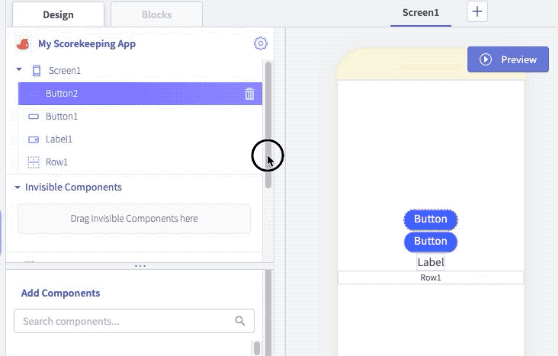
But I want my buttons to appear side by side, in the row! All I have to do is rearrange them by dragging and dropping them into the row in my component tree.
Great! That looks like EXACTLY what I want! Now I just need to rename and style each of those components, so my screen looks more polished and professional.
Styling Your Components
Step 5: Rename and style your label.
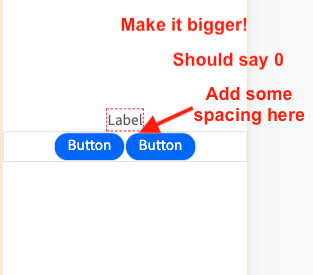
Right now, our label is small and says “Label”. I want it to be bigger, a different color, and to say 0 (our starting score). I also want there to be a little distance between the label and the row with the buttons.
On the right hand side, you’ll begin by renaming Label1 to ScoreText (it’s always good to make sure things have meaningful names!)

Next, you’ll change the following settings for the ScoreText label:
- Text: 0
- Font Size: 48
- Color: make this something zippy! I chose purple.
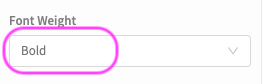
- Font Weight: Bold
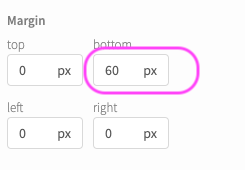
- Margin bottom: 60px
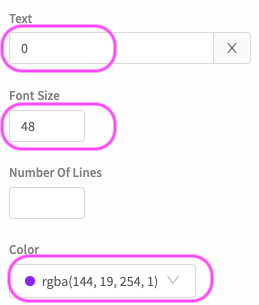
Perfect! Now you should have a label that looks more like this:

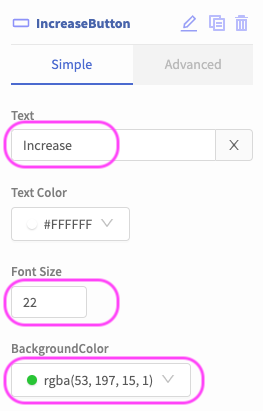
Step 6: Rename and style your buttons.
Just like you did with your label, you will rename each of your buttons so they have meaningful names, and you’ll know which is your “Increase” button and which is your “Decrease” button.
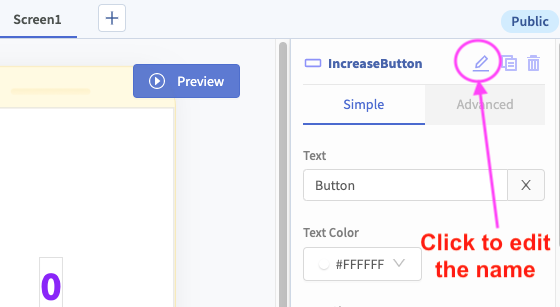
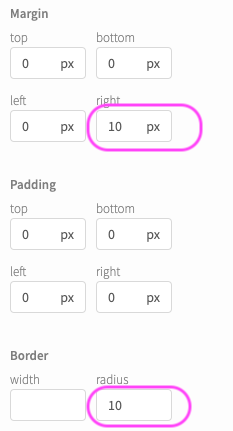
You can play around a little bit with how you want your buttons to look. I’ll share the settings that I changed. The most important thing is to make sure your “Increase” button is green, and your “Decrease” button is red.
Below are the things I changed for the IncreaseButton. See if you can change the DecreaseButton so it looks right, too!
Code!
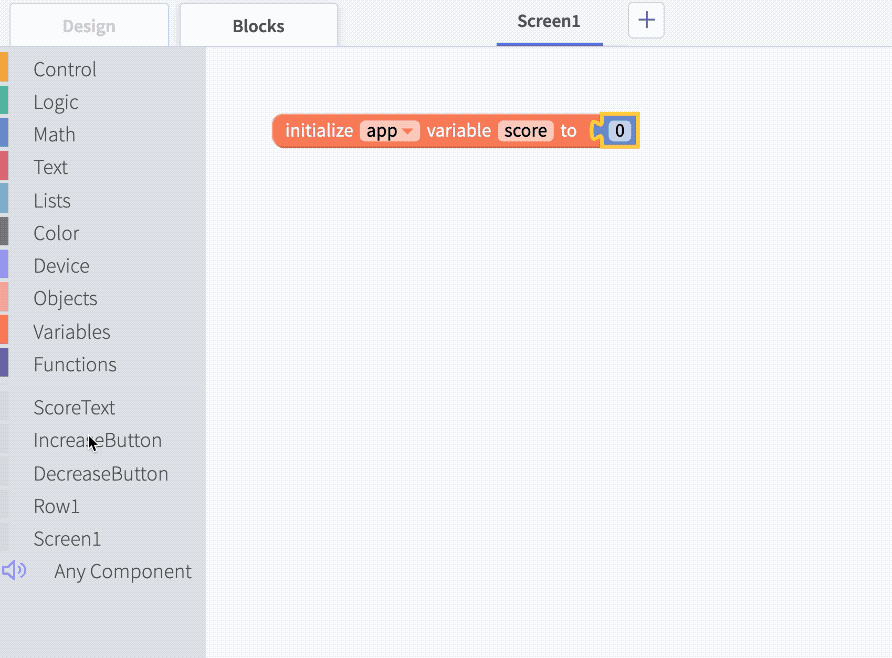
Step 7: Initialize your score variables.
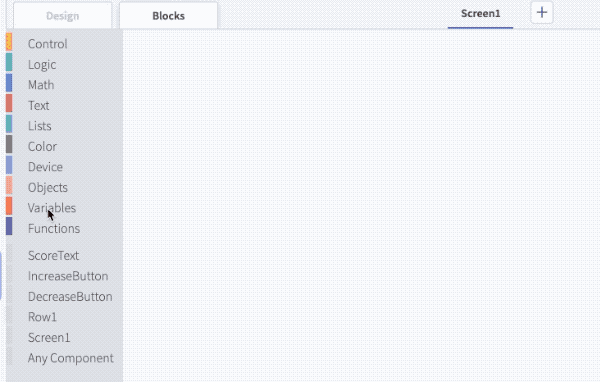
You’re going to switch from the Design tab to the Blocks tab now. It’s time to code!
The first thing we need is a variable to keep track of our score.
Click on the Variables section, and then drag the top block (“Initialize variable”) onto your Blocks canvas.
Rename your variable to score.In the Math section, drag the 0 block over and connect it to your “Initialize variable” block. We want our score to start at 0, so we don’t need to change anything there!
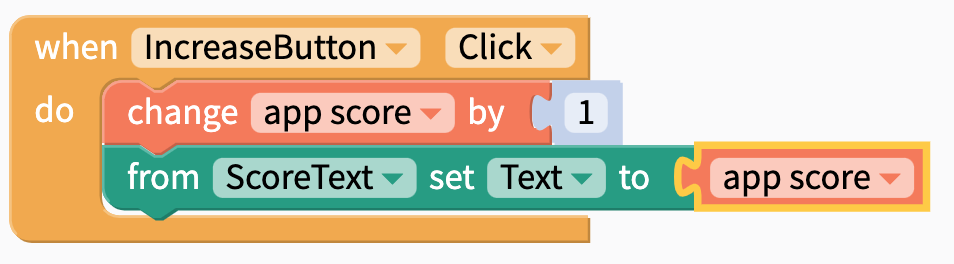
Step 8: Increase score when you click the IncreaseButton.
When you click the IncreaseButton, you want the score to go up by 1, and you want to update the ScoreText label.
Here are the blocks you’ll be using:
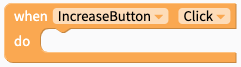


Here’s what the block assembly looks like:
And here is the final product!
Now that you’ve made the IncreaseButton increase the score when it is clicked, can you make the DecreaseButton make the score go DOWN when it is clicked?
Try it out!
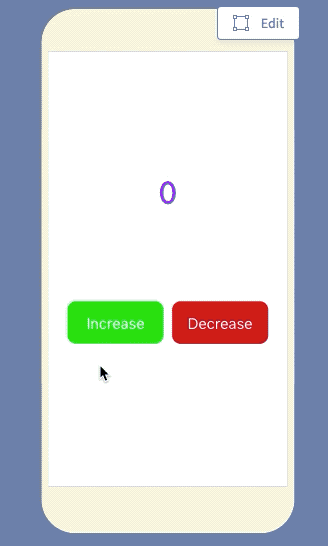
You now have a simple app, ready to test out!
Try it on your computer by navigating back to the Design tab and clicking the Preview button.
And, try it out on your mobile phone by opening up the Thunkable Live app!
Challenges
You now have a working scorekeeper app! Let’s try making it a little more sophisticated:
- Try changing the font for the score text. You can read up on how to change the font, and which fonts you can use, in the Thunkable documentation.
- Add a “Super Bonus!” button that will make the score go up by 3 (instead of just by 1) when you click it. Make this button pink!
- Set the background color of the screen to orange (or some other cheery color) when the score reaches 5!
- Play a sound when you hit a button (maybe a cheery “Ding!” for increase and a sad “Blorp” for the decrease). Maybe a special hurrah sound plays when the score reaches 10.